PixelAfterAll (PixelArt Conversion Tool)
How to use PixelAfterAll
- Document Updated 2024/05/29
- Rewrite all instruction using PixelAfterAll template node.
- Replace image.
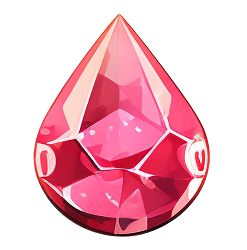
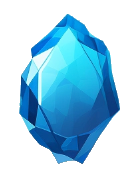
This tutorial will convert the image below into a simple pixel art style.
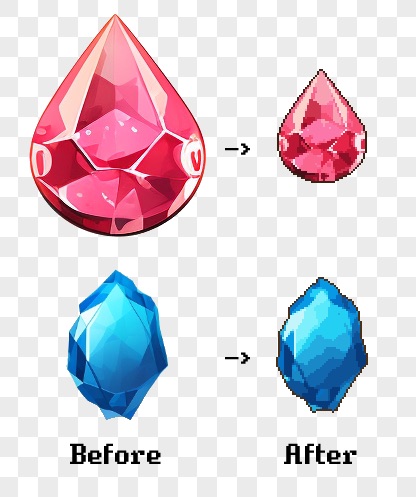
Below is an original images I use for this tutorial.
Load from pixelation template
- Start PixelAfterAll application.
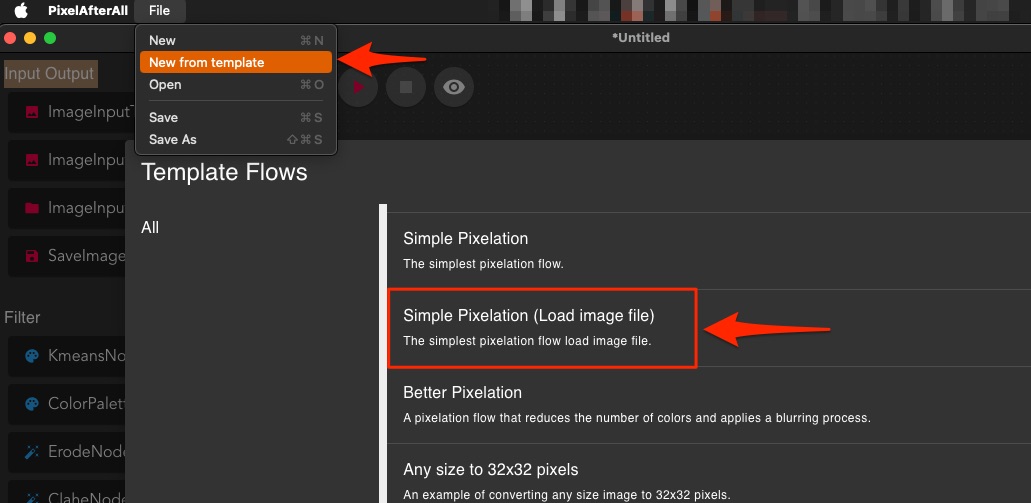
- After PixelAfterAll is run, Select menu bar "File > New from template"
- Template Flows dialog will open
- Select Simple Pixelation (Load image file)
Find "Image Input" node, click "Select Image file" and load Image to convert.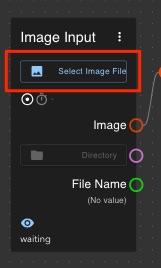
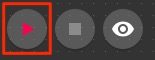
Click Play button top at left corner.
Or you can make pixelation flow by your own.
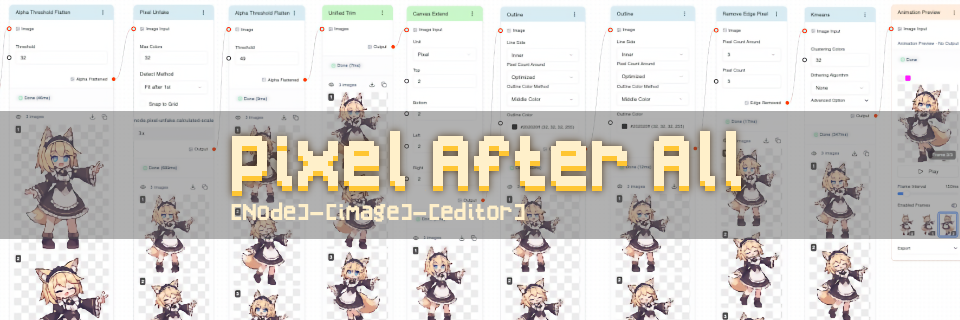
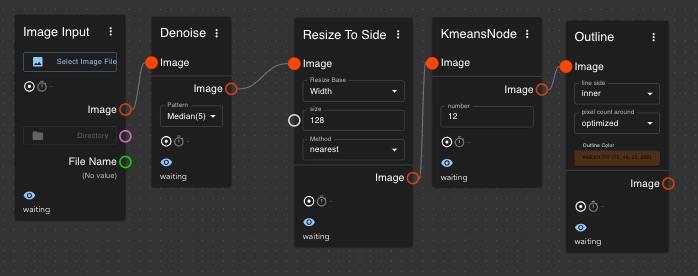
Using 4 nodes, connect red Circle handle as shown below image.
- ImageInputNode: Select image
- Resize To Side
- Resize base: any
- Size: 128px
- Method: nearest
- Kmeans Node
- number: 8
- Outline Node
- line side: inner
- pixel count around: optimized
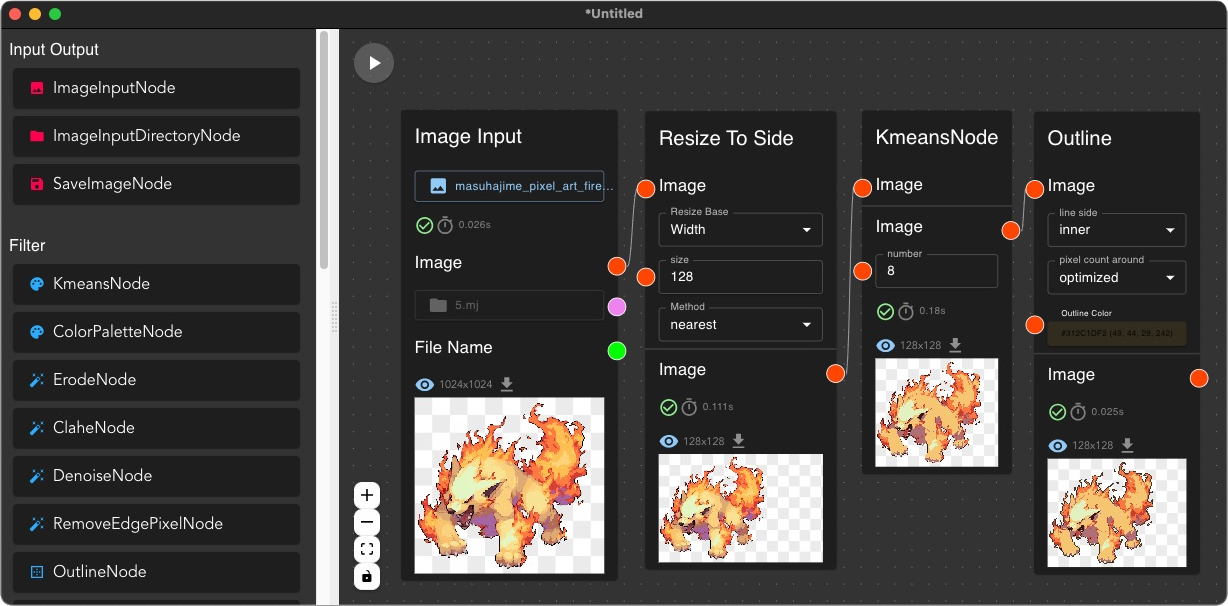
After connected, click Run button 
Comments
Log in with itch.io to leave a comment.
does not work
https://masuone.itch.io/pixel-after-all/devlog/732954/release-version-004
Could you try the some template?
Maybe this will be some hint to you using this tool.